
Nowadays, you should use SIA (e.g Sitecore Install Assistant) to install Sitecore 9.3.0 quickly and easily. Personally, I wanted to keep playing around with the Windows PowerShell console so I have a good chance to dive deeper into the problem of the install operation, if any.
This one is a summary of my own experience with the Sitecore Experience Platform 9.3 Initial Release (aka Sitecore XP 9.3.0) installation on my machine. I’ve had many versions of Sitecore XP 9.0 + Sitecore XP 9.1 + Sitecore XP 9.2 so I decided to go with the following installation guide:
- Quick Installation Guide for a Developer Workstation (thanks, Sitecore team!)
- Note: must log into https://dev.sitecore.net/ before downloading
I do hope that this blog post is helpful for your own journey as well.
Note: since Sitecore 9.3, by default, we have been able to use our own install directory rather than the default one
Setup Prerequisites
- Windows 10
- Windows PowerShell version 5.1 or later
- Sitecore License must have xDB enabled
- MS SQL Server 2016 SP2 or later
- .Net Framework 4.7.2 or later
- .NET Core 2.1.12 Windows Hosting Module
- Web Deploy 3.6
- URL Rewrite 2.1
- SOLR 8.1.1
- Red Hat OpenJDK 8 (64-bit)
- Sitecore Install Framework (SIF) 2.2.0
- Packages for XP Single
- Note: must log into https://dev.sitecore.net/ before downloading
- ensure to enable the Transport Layer Security (TLS) protocol version 1.2
Step by step guide
- (optional) if you have never installed Sitecore 9 before, you will probably want to:
- open Windows PowerShell (run as administrator)
- execute Set-ExecutionPolicy -Scope CurrentUser Unrestricted

- (optional) install Sitecore Install Framework (SIF) if not yet
- refer to 4.1.1. Install the SIF Module using MyGet (Page 15) in Quick Installation Guide for a Developer Workstation
- open Windows PowerShell (run as administrator)
- use the following commands to install the latest version of SIF
- Register-PSRepository -Name SitecoreGallery -SourceLocation https://sitecore.myget.org/F/sc-powershell/api/v2
- Install-Module SitecoreInstallFramework
- (optional) if you already installed previous SIF versions, you would have upgraded it to a new version 2.2.0
- open Windows PowerShell (run as administrator)
- you should use the following command to get all the current SIF versions
-
Get-Module -Name SitecoreInstallFramework -ListAvailable
-
- option 1: use the following command to update to the latest version of SIF
- Update-Module SitecoreInstallFramework -force
- option 2: use the following commands to remove the currents and then install the latest version of SIF
-
Uninstall-Module SitecoreInstallFramework -AllVersions
-
Install-Module SitecoreInstallFramework
-
- enable Contained Database Authentication if not yet
- refer to 2.7. Enable Contained Database Authentication (Page 09) in Quick Installation Guide for a Developer Workstation
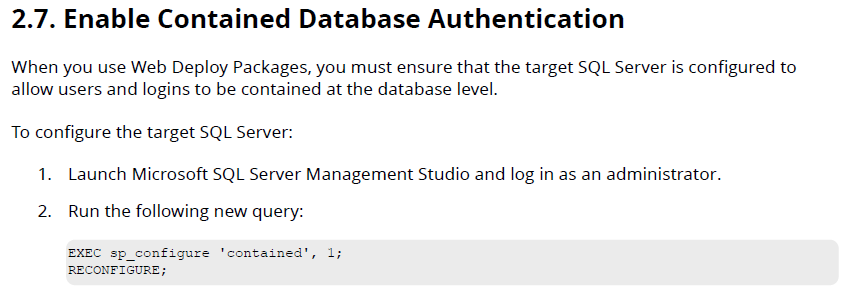
- Note: you can download the above query.
- create a new folder D:sc930_install
- download and unzip Package for XP Single (Note: must log into https://dev.sitecore.net/ before downloading)
- copy / paste the following ones to D:sc930_install
- Sitecore 9.3.0 rev. 003498 (OnPrem)_single.scwdp.zip
- Sitecore 9.3.0 rev. 003498 (OnPrem)_xp0xconnect.scwdp.zip
- Sitecore.IdentityServer 4.0.0 rev. 00257 (OnPrem)_identityserver.scwdp.zip
- unzip XP0 Configuration files 9.3.0 rev. 003498.zip and copy / paste all files to D:sc930_install
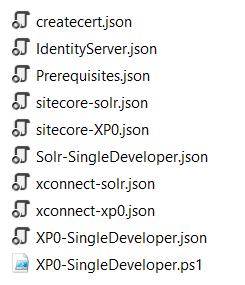
- copy / paste the following ones to D:sc930_install
- let’s install the prerequisites
- open Windows PowerShell (run as administrator)
- change directory to D:sc930_install
- execute Install-SitecoreConfiguration -Path .prerequisites.json

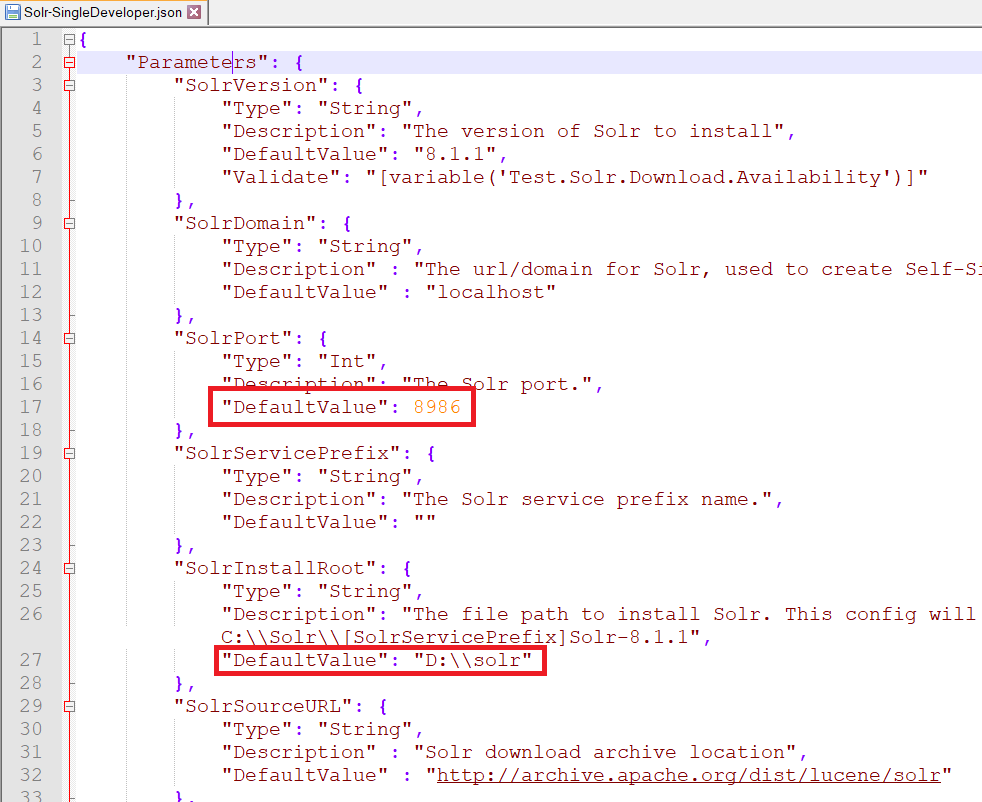
- install SOLR 8.1.1 if not yet
- adjust appropriate values by editing D:sc930_installSolr-SingleDeveloper.json such as SolrPort, SolrInstallRoot if necessary
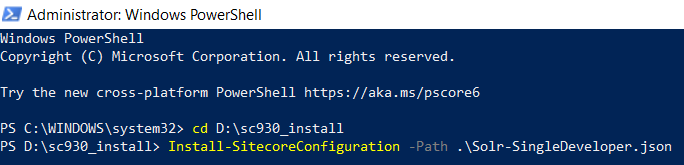
- open Windows PowerShell (run as administrator)
- change directory to D:sc930_install
- execute Install-SitecoreConfiguration -Path .Solr-SingleDeveloper.json
- copy / paste your Sitecore licence file license.xml to D:sc930_install
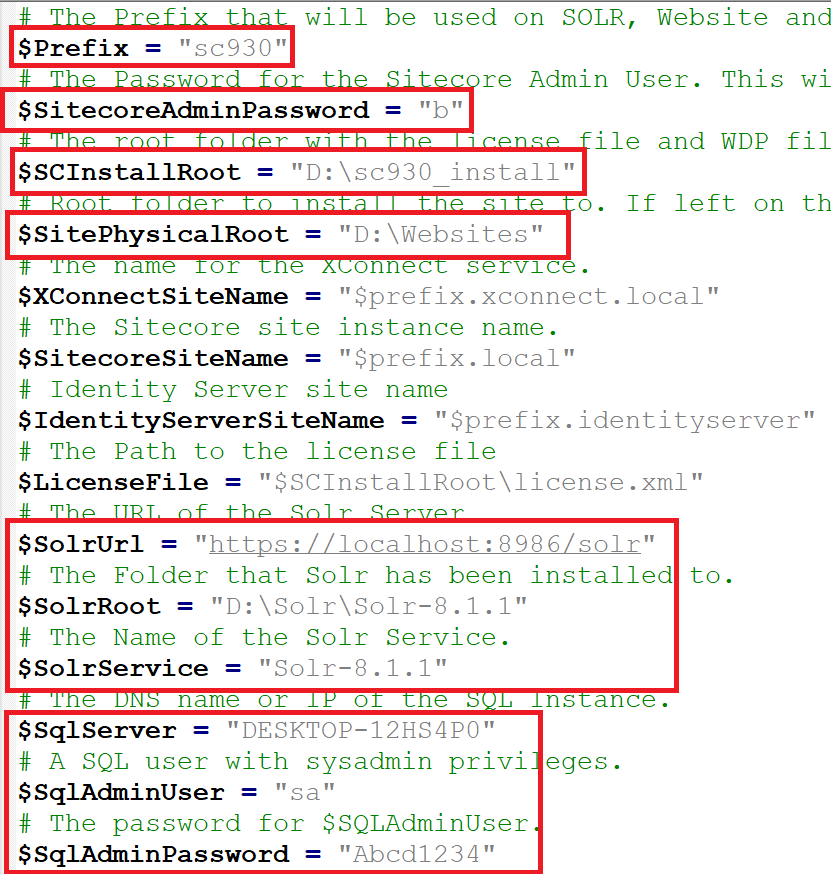
- adjust appropriate values by editing D:sc930_installXP0-SingleDeveloper.ps1 such as:
- $Prefix
- $SitecoreAdminPassword
- $SCInstallRoot
- $SitePhysicalRoot
- note 1: NEW PARAMETER so we have been able to use our install directory rather than the default one
- note 2: DON’T use double backslash \ in the folder path (for instance
D:\websites)otherwise you may get the following error Failed to start service ‘Sitecore Marketing Automation Engine 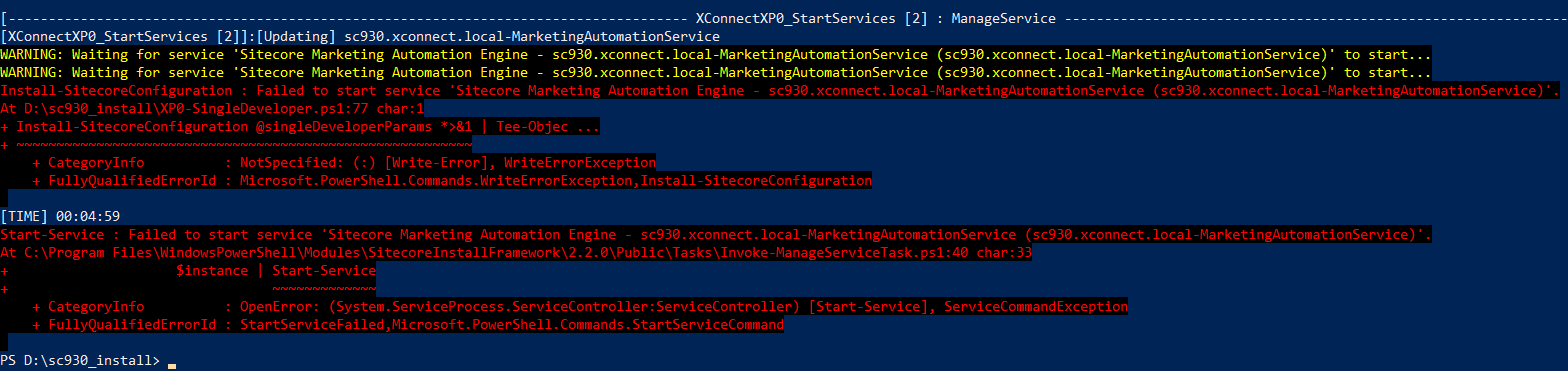
- $SolrUrl
- $SolrRoot
- $SqlServer
- $SqlAdminUser
- $SqlAdminPassword
- open Windows PowerShell (run as administrator)
- (optional) if you have various SIF versions on your machine, you will probably have to run 2.2.0 version of SIF by executing Import-Module SitecoreInstallFramework -Force -RequiredVersion 2.2.0
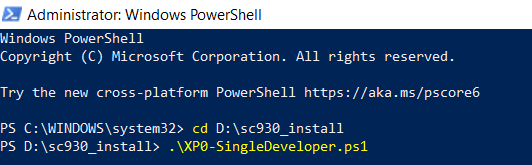
- change directory to D:sc930_install
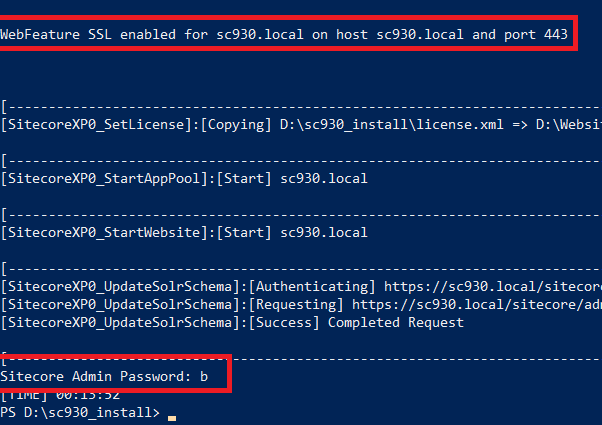
- execute .XP0-SingleDeveloper.ps1
- hopefully there is nothing that can stop the installation process and note Sitecore Admin Password + SSL enabled as well
- open a browser:
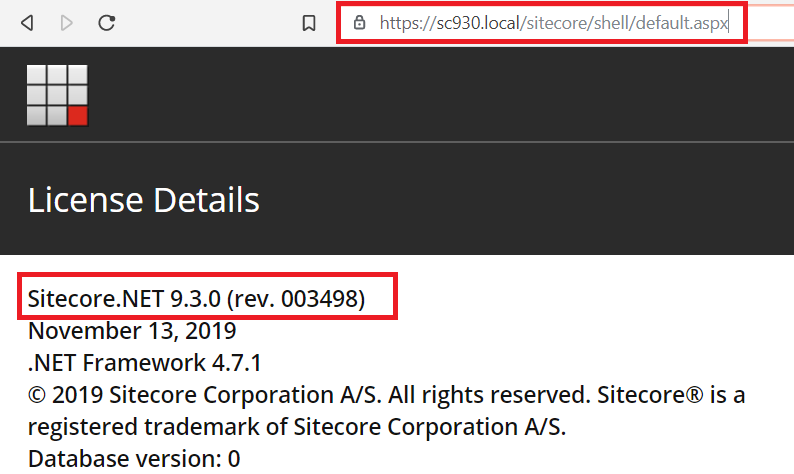
- navigate to https://sc930.local/ to see the Sitecore default page
- navigate to https://sc930.local/sitecore and then be redirected to https://sc930.identityserver.local/ (log into it by using account admin / Sitecore Admin Password)
- DON’T FORGET to rebuild the search indexes and the Link database
- refer to 5.5. Rebuild the search indexes and the Link database (Page 21) in Quick Installation Guide for a Developer Workstation
How to uninstall it?
- open D:sc930_installXP0-SingleDeveloper.ps1 and uncomment the line 80 + comment out the line 77 then save it

- open Windows PowerShell (run as administrator)
- change directory to D:sc930_install
- execute .XP0-SingleDeveloper.ps1
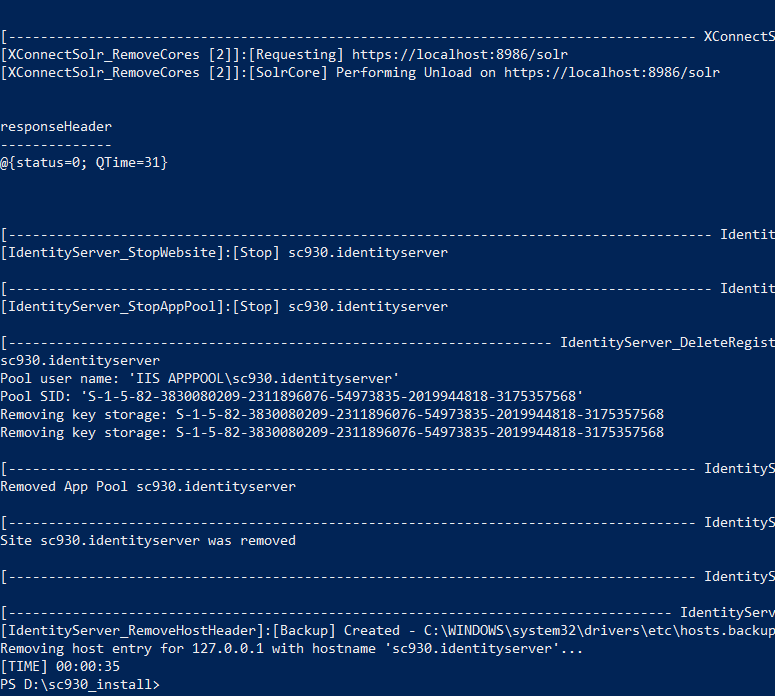
- hopefully, it runs well and cleans everything up
Got issues?
Please send your issues (with screenshots if possible) to [email protected] so that I can understand your problem and suggest a solution.
Happy Sitecore 9.3.0 Installation!
This article originally appeared on Walking on clouds (https://buoctrenmay.com/).