This one is a summary of my own experience for Sitecore Experience Commerce 9 Update 2 (aka Sitecore XC 9.0.2) installation on my machine. I’ve had much experience with Sitecore XC9 installation and Sitecore XC9 Update 1 installation so I decided to go only with:
- Installation Guide – On Premises (Thanks Sitecore team!)
I do hope that this blog post is helpful for your journey as well.
Setup Prerequisites
Please refer to the Sitecore Experience Commerce 9 Compatibility Table for the software and version prerequisites:
- Windows 10
- Sitecore Experience Platform 9.0 Update 2
- Sitecore Experience Accelerator 1.7.1(Note: must log into https://dev.sitecore.net/ before downloading)
- Sitecore Powershell Extensions 4.7.2
- .NET Core SDK 2.0.0
- .NET Core Windows Server Hosting 2.0.0
- Note: you may get Sitecore Commerce APIs 500 error so should upgrade to .NET Core Windows Server Hosting 2.0.8
- Packages for On Premises 2018.07-2.2.126(Note: must log into https://dev.sitecore.net/ before downloading)
Step-by-step guide
- install the ones below if not yet
- a fresh Sitecore 9.0 Update 2 instance, let’s say sc9com.local and sc9com.xconnect.local (xConnect site)
- .NET Core SDK 2.0.0
- .NET Core Windows Server Hosting 2.0.0
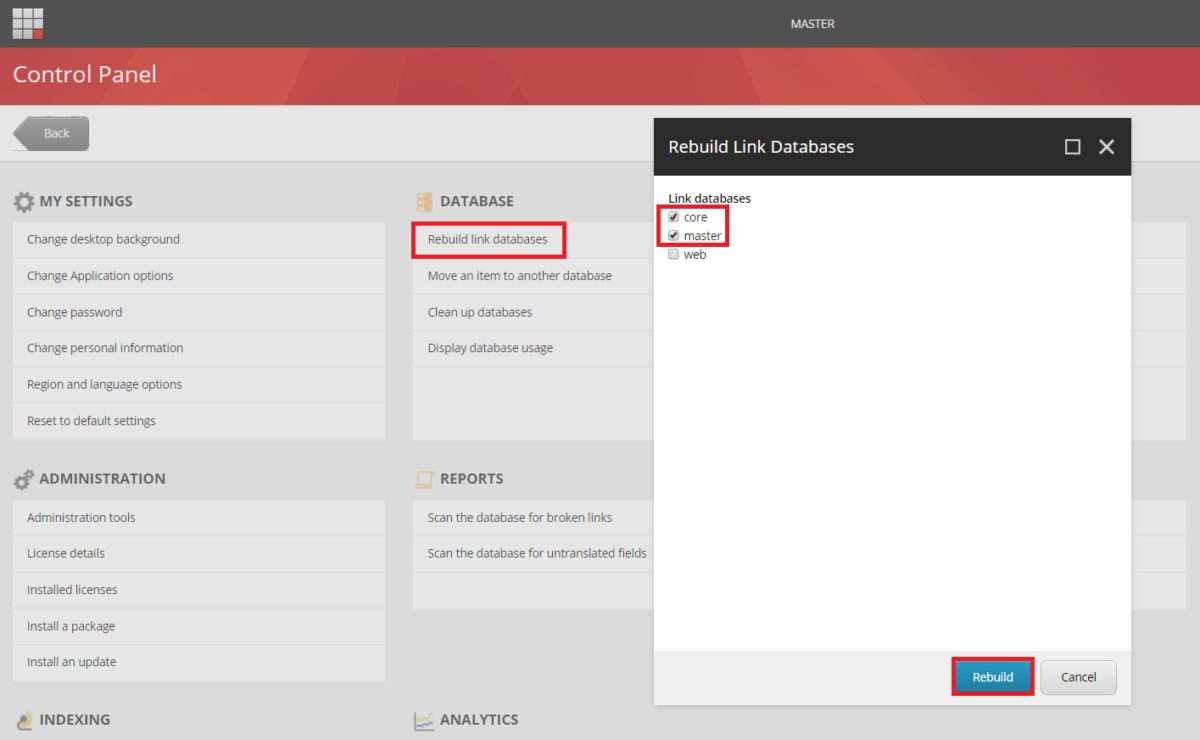
- rebuild the Link databases for the master and core databases if not yet:
- on the Sitecore Launchpad, click Control Panel, and in the Database section, click Rebuild Link Databases
- select the master and core databases and then click Rebuild
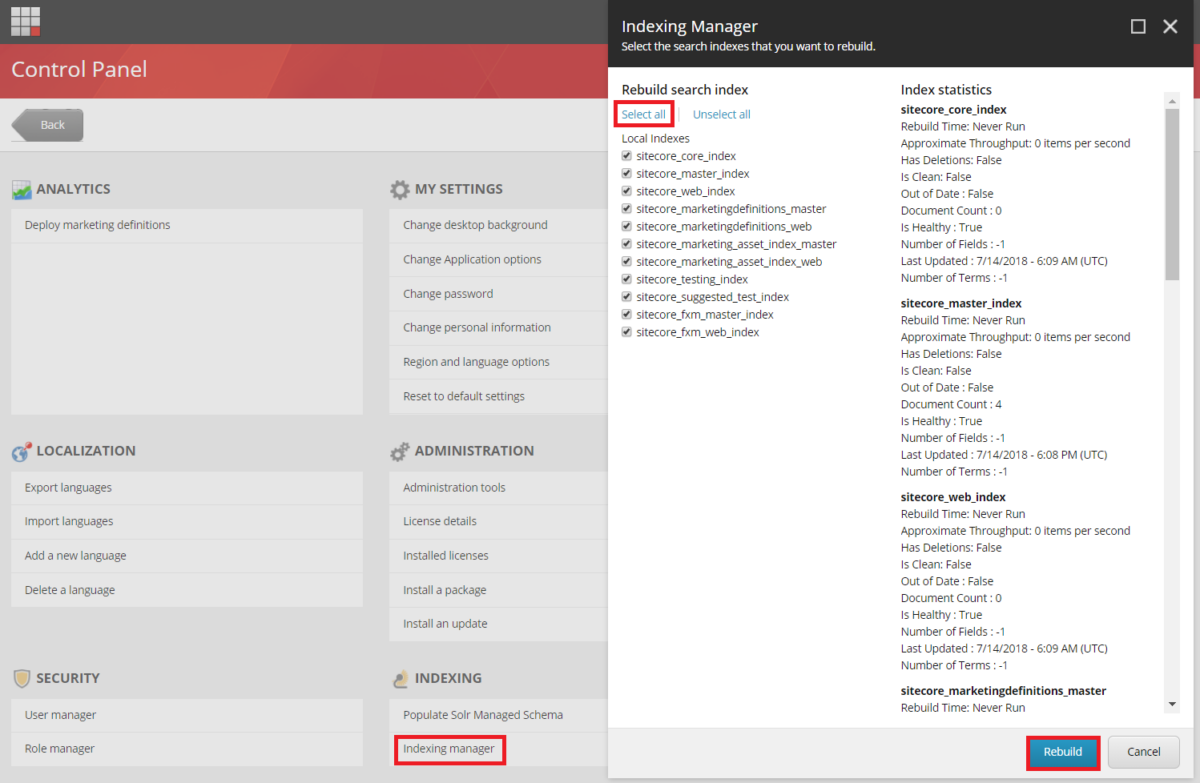
- rebuild the search indexes if not yet:
- on the Sitecore Launchpad, click Control Panel, and in the Indexing section, click Indexing manager
- in the Indexing Manager dialog box, click Select all, and then click Rebuild
- DO NOT stop the xConnect site xconnect.local
- from the installation guide with love (Page 9)

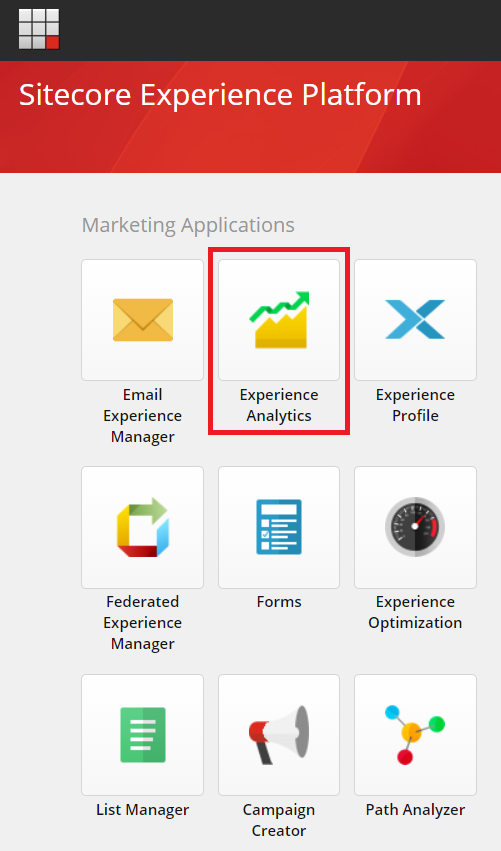
- ensure that Experience Analytics is working properly
- Note: if there is any error
- option 1: you will have to solve it before installing XC by opening the Sitecore log and then having a look at the error messages (normally, they’re certificate issues)
- option 2: you may want to disable xDB and then fix the error later after installing XC successfully
- create a new folder E:\sc9_com_install
- create a certificate for the Sitecore Commerce Engine Connect to authenticate with the Sitecore XC Engine:
- launch PowerShell as an administrator
- create the certificate by running the following cmdlet:
- New-SelfSignedCertificate -certstorelocation cert:\localmachine\my -dnsname “storefront.local”
- export the certificate to a file by running the following cmdlet:
- Export-Certificate -Cert cert:\localMachine\my\<Thumbprint-of-cert> -FilePath E:\sc9_com_install\storefront.local.cer

- download MSBuild Microsoft Visual Studio Web targets (available from Nuget) then extract the Web targets package, copy the \tools\VSToolsPath\Web\Microsoft.Web.XmlTransform.dll file into E:\sc9_com_install
- download Sitecore Experience Accelerator 1.7.1(Note: must log into https://dev.sitecore.net/ before downloading) and put it into E:\sc9_com_install
- download Sitecore Powershell Extensions 4.7.2then put it into E:\sc9_com_install
- download and unzip Packages for On Premises 2018.07-2.2.126(Note: must log into https://dev.sitecore.net/before downloading) then put it into E:\sc9_com_install
- unzip E:\sc9_com_install\Sitecore.Commerce.1.2.14.zipand then rename E:\sc9_com_install\SIF.Sitecore.Commerce.1.2.14to E:\sc9_com_install\SIF for a better practice
- unzip the E:\sc9_com_install\BizFX.1.2.19.zip
- unzip the E:\sc9_com_install\Commerce.Engine.SDK.2.2.72.zip file then copy the E:\sc9_com_install\Sitecore.Commerce.Engine.SDK.2.2.72\Sitecore.Commerce.Engine.DB.dacpacfile into E:\sc9_com_install
- Note: you will see the following error message if you copy / paste the one of XC 9 Update 1

- ERROR Message=SQL.InsertEntity.Fail: Id=’Entity-PolicySet-ControllerMethodRolesPolicySet’|Environment=’GlobalEnvironment’|Message=’Procedure or function sp_CommerceEntitiesInsert has too many arguments specified.
- unzip E:\sc9_com_install\Commerce.Engine.2.2.126.zip
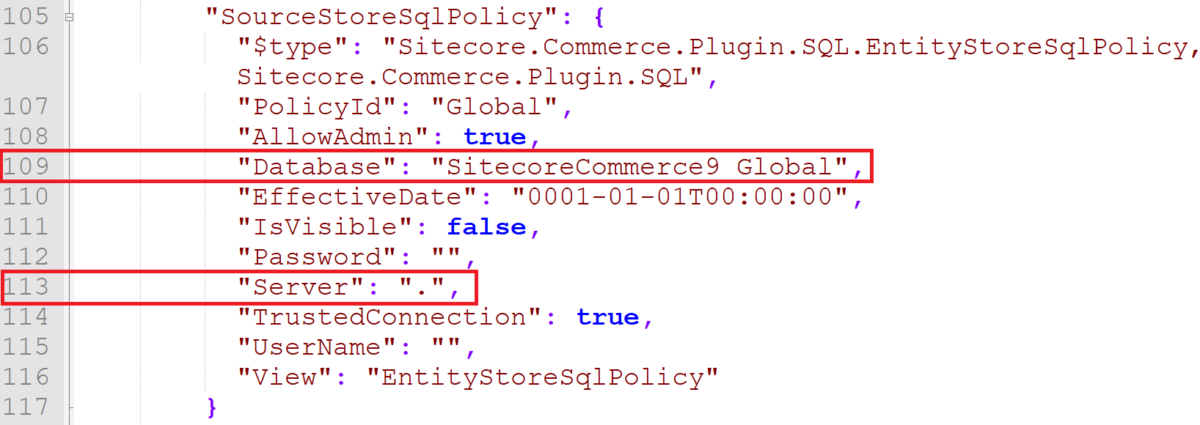
- open E:\sc9_com_install\Sitecore.Commerce.Engine.2.2.126\wwwroot\bootstrap\Global.json
- replace the Database‘s value to “SitecoreCommerce9_Global” at line 109 (the default value is NOT correct)
- ensure the Server‘s value is “.” at line 113 (it’s empty by default)
- zip the folder E:\sc9_com_install\Commerce.Engine.2.2.126as E:\sc9_com_install\Sitecore.Commerce.Engine.2.2.126\Sitecore.Commerce.Engine.2.2.126.zip file then overwrite E:\sc9_com_install\Sitecore.Commerce.Engine.2.2.126.zip with it
- download sc9_com_install.ps1 and put it into E:\sc9_com_install\SIF then open it to correct 09 parameters below:
- $SitePrefix
- $ScInstallDirectory
- $SiteHostHeaderName
- $SqlServer
- $SqlDbPrefix
- $CommerceEngineCertificatePath
- $SolrUrl
- $SolrRoot
- $SolrService
- (optional): you can specify any local account (note: it will be created automatically if non-existent) to be set up for the various application pools that are created as part of the deployment at line 76-77 of sc9_com_install.ps1
- (optional): if you play with SQL Server 2017, you will have to download DeployCommerceDatabase.psm1 then overwrite E:\sc9_com_install\SIF\Modules\DeployCommerceDatabase\DeployCommerceDatabase.psm1
- (optional): if you have multiple instances of SQL Server on your machine, you will have to:
- unzip E:\sc9_com_install\Commerce.Engine.2.2.126.zip
- open E:\sc9_com_install\Sitecore.Commerce.Engine.2.2.126\wwwroot\bootstrap\Global.json
- replace the Server’s value to your SQL Server instance at line 113 (Note: double-backslash escape if any)

- open E:\sc9_com_install\Sitecore.Commerce.Engine.2.2.126\wwwroot\data\Environments\PlugIn.Habitat.CommerceAuthoring-1.0.0.jsonthen replace the Server‘s value to your SQL Server instance at line 130 (Note: double-backslash escape if any)
- open E:\sc9_com_install\Sitecore.Commerce.Engine.2.2.126\wwwroot\data\Environments\PlugIn.AdventureWorks.CommerceAuthoring-1.0.0.jsonthen replace the Server‘s value to your SQL Server instance at line 130 (Note: double-backslash escape if any)
- zip the folder E:\sc9_com_install\Commerce.Engine.2.2.126 as E:\sc9_com_install\Sitecore.Commerce.Engine.2.2.126\Sitecore.Commerce.Engine.2.2.126.zip file then overwrite E:\sc9_com_install\Sitecore.Commerce.Engine.2.2.126.zipwith it
- (optional): you may get timeout exceptions (some tasks’ execution timeout is only 12 minutes by default and the remote query timeout of SQL Server is only 10 minutes by default) so I suggest:
- download SitecoreUtilityTasks.psm1 then overwrite E:\sc9_com_install\SIF\Modules\SitecoreUtilityTasks\SitecoreUtilityTasks.psm1 in order to increase the execution timeout
- download PerformanceTweak.config then put it into \sc9com.local\App_Config\Environment in order to turn all Sitecore jobs off and disable xDB for a better installation (you know, it’s a super long operation :D)
- configure the remote query timeout option of SQL Server:
- using SQL Server Management Studio
- in Object Explorer, right-click a server and select Properties
- under Remote server connections, in the Remote query timeout box, type or select a value from 0 through 2,147,483,647 to set the maximum number seconds for SQL Server to wait before timing out
- consider to put $global:ProgressPreference = ‘silentlyContinue’into the sc9_com_install.ps1 in order to speed up the operation
- launch PowerShell as an administrator

- hopefully there is nothing can stop the installation process now
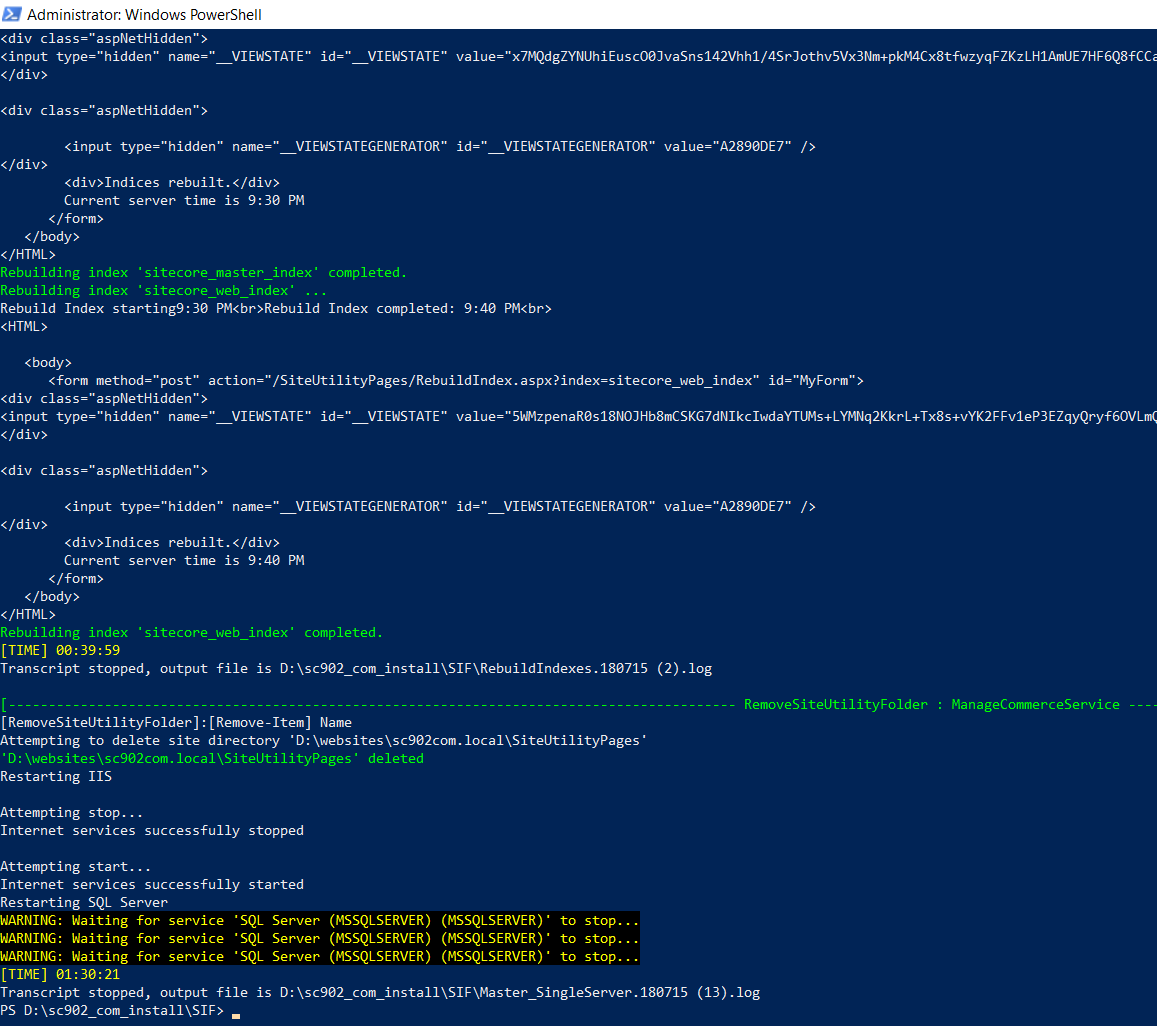
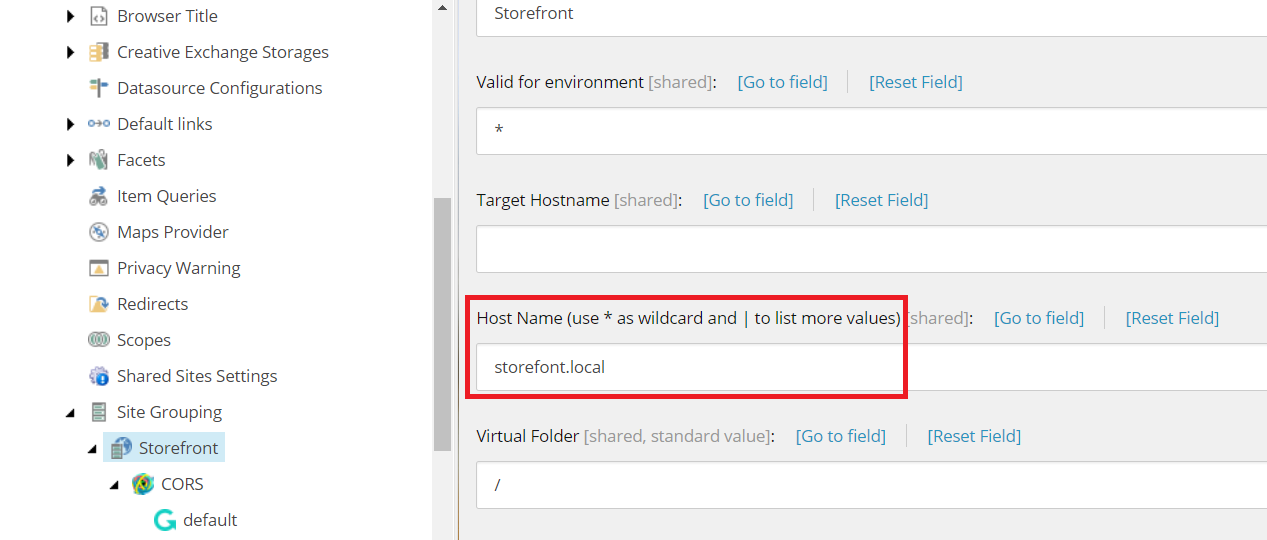
- open a browser then navigate to storefront.local/, you would see the default page of Sitecore website. That’s because we don’t use the default host name sxa.storefront.com so we need to correct it inside Sitecore
- log into sc9com.local/sitecore/
- access /sitecore/content/Sitecore/Storefront/Settings/Site Grouping/Storefront
- update Host Name to storefront.local and then publish it
- refresh storefront.local/, you would see something like this

- I’m sure that you want to make it more fancy so access /sitecore/content/Sitecore/Storefront/Presentation/Page Designs
- update Theme to Storefont Branded and then publish it

- refresh storefront.local/, you would see something like this

- DO NOT forget to perform Post-Installation Steps
- remove \sc9com.local\App_Config\Environment\PerformanceTweak.config if existent
- follow Chapter 4 Post-Installation Steps (Page 15 – 17) in Sitecore Commerce 9 Update 2 Installation Guide
The recommendations
- we can remove the tasks completed from E:\sc9_com_install\SIF\Configuration\Commerce\Master_SingleServer.json and re-do Step 20 if there is something wrong (especially for Note: some known issues below) so that we are able to save a lot of time
- if there is something wrong during installation process, we always have a chance to correct it via json files (note: need to do IIS reset after updating):
- C:\inetpub\wwwroot\SitecoreIdentityServer\wwwroot\appsettings.json
- C:\inetpub\wwwroot\CommerceShops_Sc9\wwwroot\bootstrap\Global.json
- C:\inetpub\wwwroot\CommerceOps_Sc9\wwwroot\bootstrap\Global.json
- C:\inetpub\wwwroot\CommerceMinions_Sc9\wwwroot\bootstrap\Global.json
- C:\inetpub\wwwroot\CommerceAuthoring_Sc9\wwwroot\bootstrap\Global.json
- C:\inetpub\wwwroot\CommerceShops_Sc9\wwwroot\data\Environments\Plugin.SQL.PolicySet-1.0.0.json
- C:\inetpub\wwwroot\CommerceShops_Sc9\wwwroot\data\Environments\PlugIn.Habitat.CommerceAuthoring-1.0.0.json
- C:\inetpub\wwwroot\CommerceShops_Sc9\wwwroot\data\Environments\PlugIn.AdventureWorks.CommerceAuthoring-1.0.0.json
How to uninstall it?
- download sc9_com_uninstall.ps1 and put it into E:\sc9_com_install then open it to correct 07 parameters below:
- $EngineSuffix
- $Prefix
- $SolrService
- $PathToSolr
- $SqlServer
- $SqlAccount
- $SqlPassword
- launch PowerShell as an administrator
- hopefully, it runs well and cleans everything up
Note: some known issues
- The service cannot accept control messages at this time
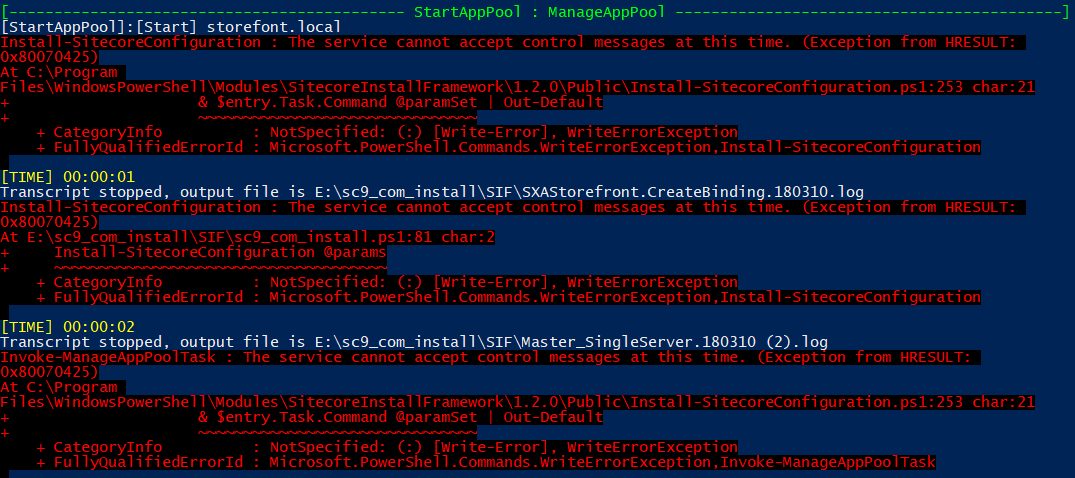
- access IIS, start sc9com.local site and sc9com.local application pool manually (note: you may need to do it several times) if they’re in STOP status, somehow IIS cannot restart those ones after stopping them
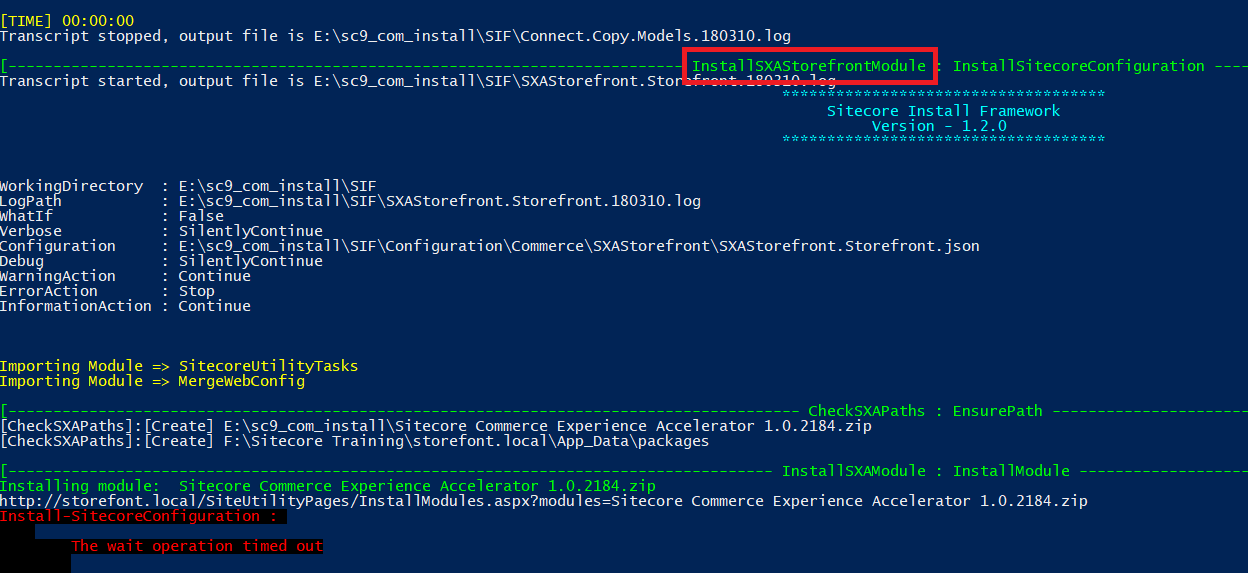
- The wait operation timed out: [SqlException (0x80131904): Connection Timeout Expired. The timeout period elapsed during the post-login phase. The connection could have timed out while waiting for server to complete the login process and
respond; Or it could have timed out while attempting to create multiple active connections.
- open E:\sc9_com_install\SIF\Configuration\Commerce\Master_SingleServer.json to remove the tasks completed
- for instance, I would remove all the completed tasks before InstallSXAFrameworkModule then re-do Step 20 again
- Request timed out: Exception Details: System.Web.HttpException: Request timed out.
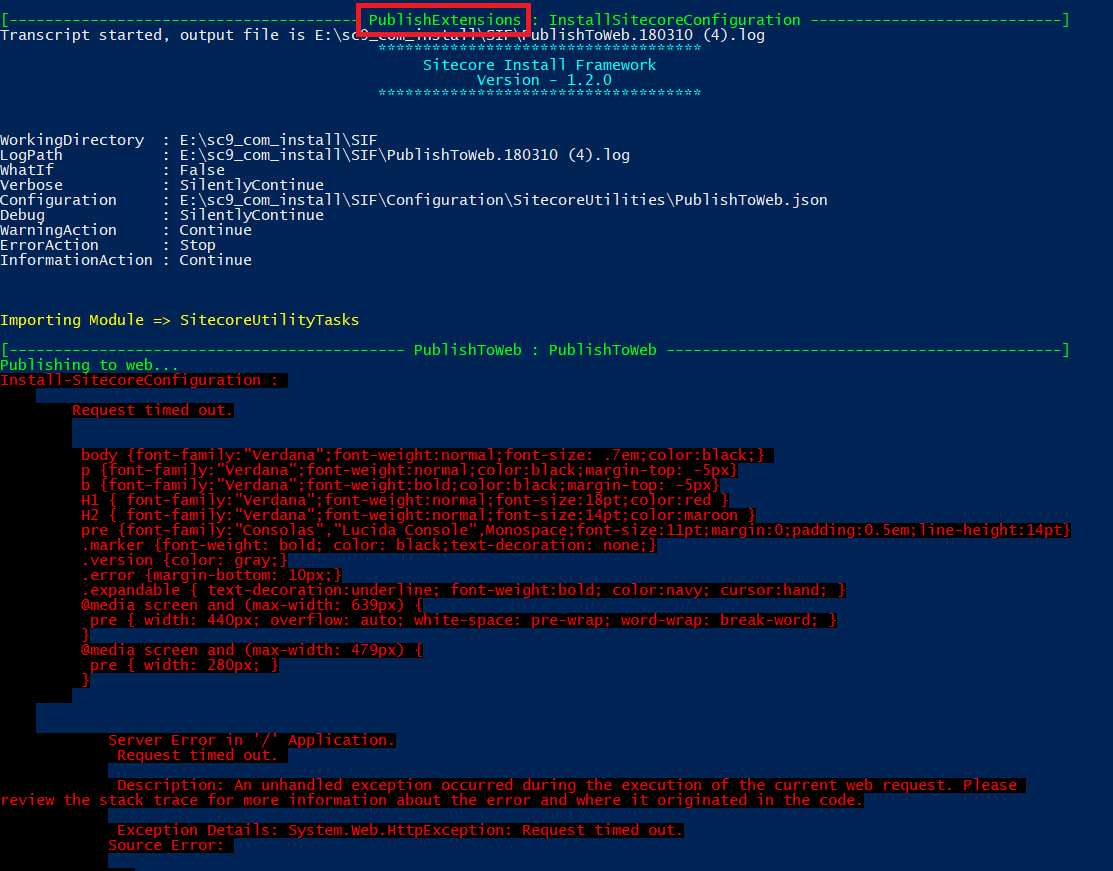
- my suggestions:
- open E:\sc9_com_install\SIF\Configuration\Commerce\Master_SingleServer.json to remove the tasks completed
- for instance, I would remove all the completed tasks before PublishExtensions then re-do Step 20 again
- consider to perform Step 19 as well if solution #1 does not work as expected then re-do Step 20 again
- open E:\sc9_com_install\SIF\Configuration\Commerce\Master_SingleServer.json to remove the tasks completed
- Something went wrong restarting SQL server again: Cannot validate argument on parameter ‘InputObject’. The argument is null or empty. Provide an argument that is not null or empty, and then try the command again.

- somehow SQL Server window service cannot restart after stopping, ensure SQL Server window service is running
- Install-SitecoreConfiguration : Cannot find path ‘C:\inetpub\wwwroot\CommerceOps_Sc9\wwwroot\config.json’ because it does not exist.
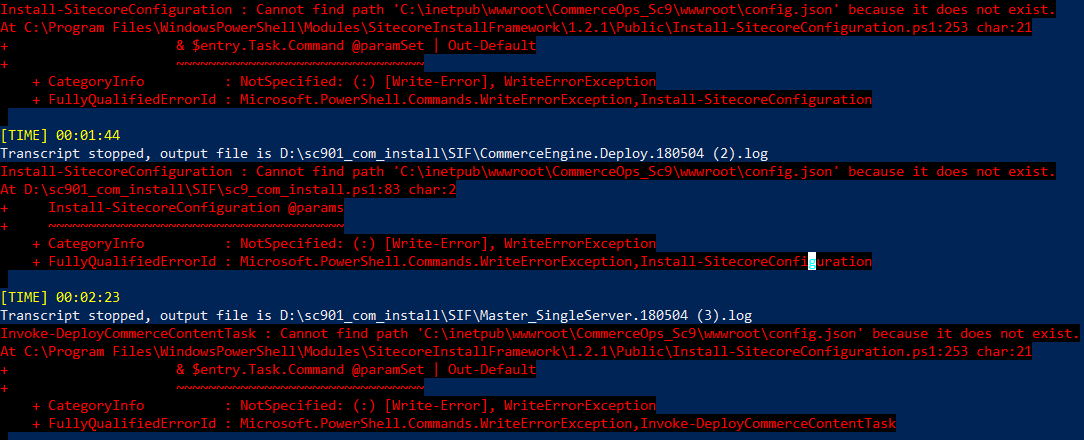
- in Step 15, ensure to create Sitecore.Commerce.Engine.2.2.126.zip correctly (especially directory structure)
- Get Token From Sitecore.IdentityServer: HTTP Error 503. The service is unavailable
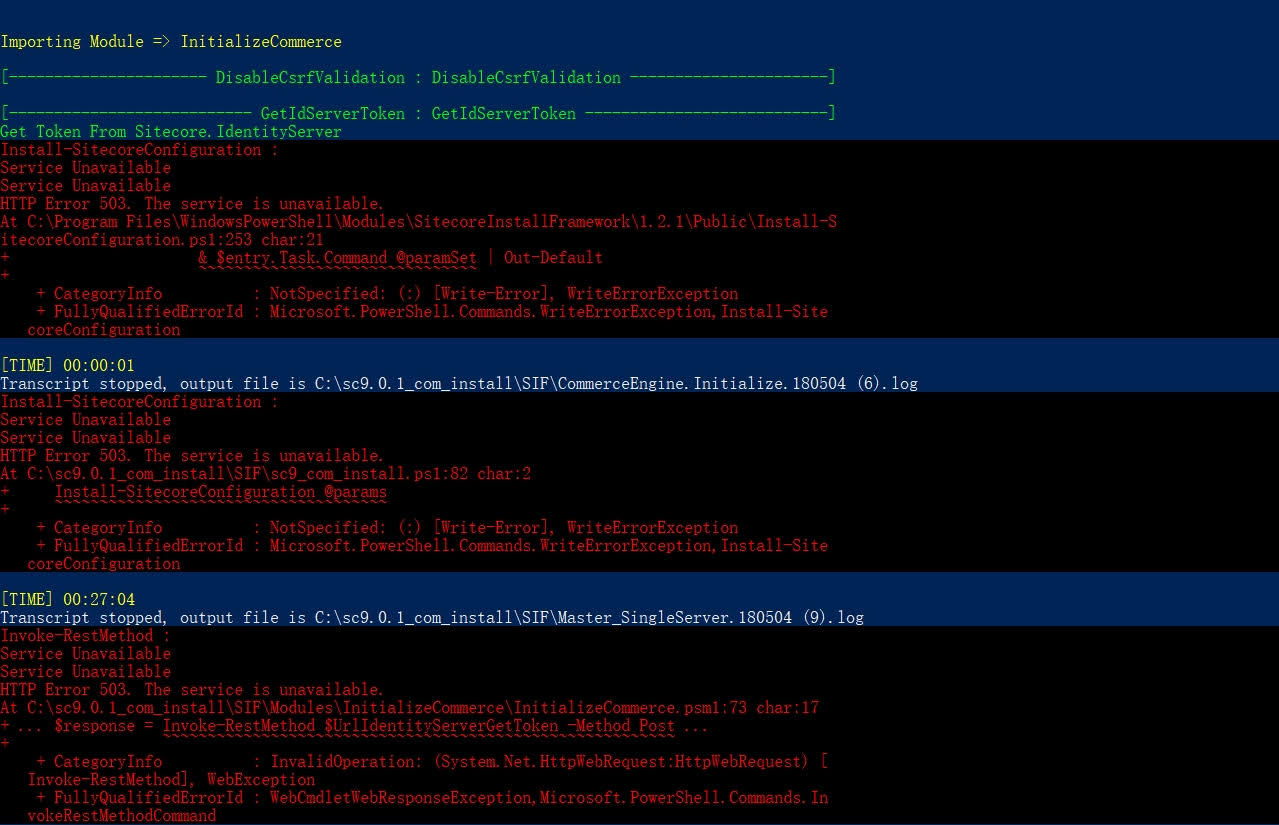
- my suggestions:
- ensure to install .Net Core stuffs
- correct connection string in “C:\inetpub\wwwroot\SitecoreIdentityServer\wwwroot\appsettings.json” and then do IIS reset
- correct the application pool of SitecoreIdentityServer site in IIS
- Ensure/Sync default content paths for environment AdventureWorksAuthoring failed
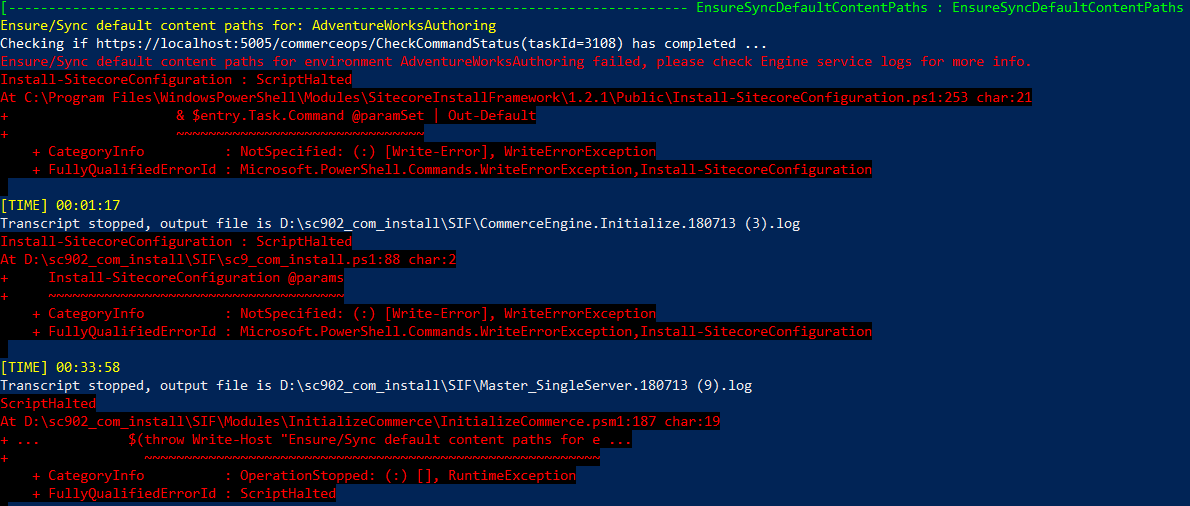
- ensure to perform Step 14 and Step 18 correctly
- ERROR Exception when executing agent aggregation/pathAnalyzerHistoryAgent
Exception: Sitecore.XConnect.XdbCollectionUnavailableException
Message: The HTTP response was not successful: Forbidden
Source: Sitecore.Xdb.Common.Web- have a look at https://sitecorecorner.com/2017/10/25/sitecore-9-xconnect-ssl-and-that-403-forbidden/
- ensure to remove all non-self-signed certificates out of Trusted Root Certification Authorities certificate store (you can move them to Intermediate Certification Authorities certificate store)
- Note: should use this Windows Powershell command Get-Childitem cert:\LocalMachine\root -Recurse | Where-Object {$_.Issuer -ne $_.Subject} to find them out
- The specified module ‘sqlps’ was not loaded because no valid module file was found in any module directory
Got issues?
Please send your issues (with screenshots if possible) to [email protected] so that I have a chance to understand your problem and be able to suggest the solution.
Happy Sitecore Installation!
This article originally appeared on Walking on clouds (https://buoctrenmay.com/).


